Subject Wizard - Select Tables |


|

|
|
|
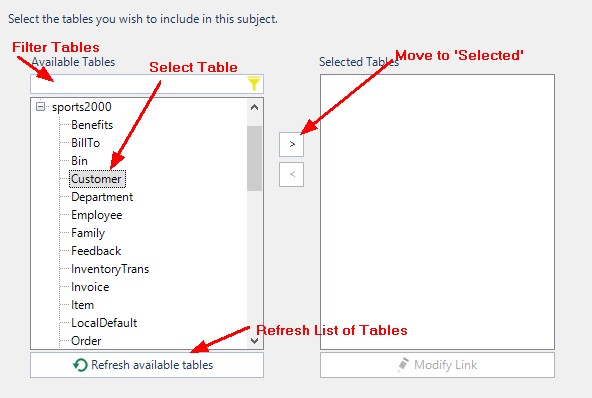
This screen lets you include the Tables which make up your Freeform Subjects. The form contains a list of Available Tables and a list of the Tables you have selected. |
|
To select your first Table, click in the Available list, on the table you wish to select. This will highlight your choice. Then click on the '>' button to move your choice over to the Selected list.
Text can be entered into the Filter box to limit the list of tables. |
|
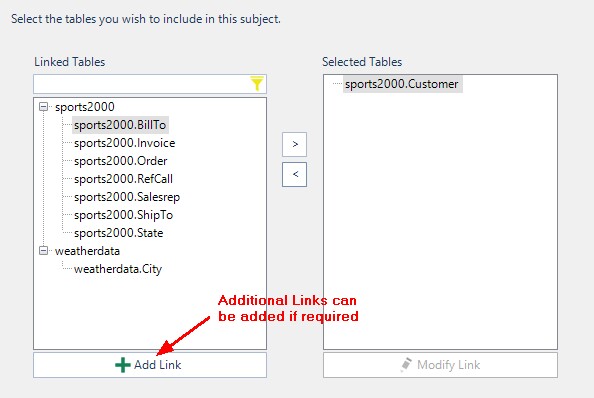
Your chosen table is now highlighted in the Selected list. The Available list has now changed. The Tables are now listed under Linked Tables, are those tables which have a Link to the Table highlighted in the Selected list.
It is possible to add a New Link if a table is required using the Add Link button that opens the Link Wizard .
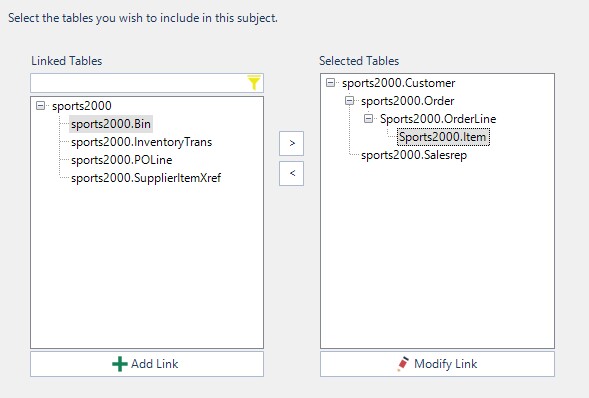
Once you have more than one table in the Selected list, you should take care when choosing further tables. In the diagram above, Customer is selected and one of the available tables is Salesrep. In the diagram below, Order is selected and one of the available tables is again Salesrep. This means that there are links between Customer and Salesrep, and between Order and Salesrep. If you want to use the Link Between Customer and Salesrep, make sure that Customer is highlighted in the Selected List when you choose Salesrep from the Available List. |
|
Once you have selected the tables you require, you can change the links that bind these records by selecting the child record of the link in the Selected list and pressing the Modify Link button. This will open the Link Wizard to allow you to change the link. Any changes you make will not effect the link for any other subjects.
If you incorrectly select a table, you can click on it in the Selected List and use the '<' button to move it back to the Available List.
By holding down the mouse button and dragging you can choose multiple tables in either list, to move over to the other list. |
Once you have selected all the tables that you require in your Subject, click on the 'Next >' button to move on to the to the Subject Wizard - Define Criteria screen.
As with the other forms in the Subject Wizard you can click on Cancel or '< Back' at any time.
|
| ||||